
| 일 | 월 | 화 | 수 | 목 | 금 | 토 |
|---|---|---|---|---|---|---|
| 1 | ||||||
| 2 | 3 | 4 | 5 | 6 | 7 | 8 |
| 9 | 10 | 11 | 12 | 13 | 14 | 15 |
| 16 | 17 | 18 | 19 | 20 | 21 | 22 |
| 23 | 24 | 25 | 26 | 27 | 28 | 29 |
| 30 |
- 파이썬
- node.js
- 이클립스
- spring
- 코딩
- 웹페이지 만들기
- java
- 문자열 자르기
- QR코드
- 웹개발
- 백엔드
- 노드
- 웹페이지
- Spring Boot
- HTML
- Eclipse
- sts4
- 홈페이지 만들기
- jsp
- 스프링부트
- 백앤드
- 프론트엔드
- Python
- 개발자
- 문자열
- git
- zxing
- 프롬포트 수정
- 웹개발자
- Javascript
- Today
- Total
웹개발왕
[QR.G] JAVA zxing을 이용해서 QR 코드 색상바꾸기 본문

안녕하세요. 오늘은 zxing을 이용해서 QR 코드 색상 바꾸는 방법을 알아보겠습니다.
QR 코드 생성하는 방법을 아직 모르신다면 이전 포스팅 참고해주세요. ▼
[QR.G] JAVA로 QR 코드 생성하는 웹페이지 만들기
안녕하세요. 오늘은 QR 코드 생성 웹페이지인 'QR.G'를 만들기 위한 첫단계인 사용자가 입력한 URL 주소로 QR 코드 생성하는 방법을 알아보겠습니다. JAVA로 QR 코드를 방법은 여러가지 있지만 저는 '
web-developer1.tistory.com
QR 코드 색상 지정하기
zxing으로 QR 코드 색상 지정하는 방법은 간단합니다.
이전 포스팅에 Controller 소스 부분에서 색상 코드를 추가하면 되는데요.
소스는 아래와 같습니다.
@GetMapping(value = "/qr/generate")
public @ResponseBody String test(String url) throws WriterException {
// QR 정보
int width = 200;
int height = 200;
String fileType = "png";
// Android.Graphic.Color
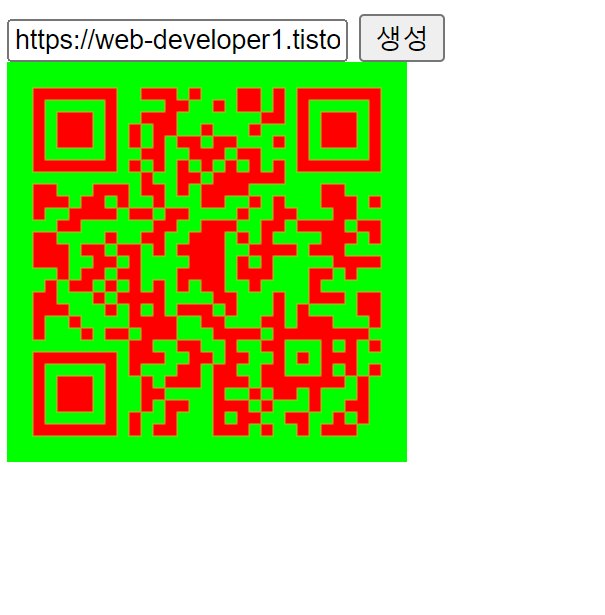
int QR_CodeColor = 0xffff0000; // 빨간색
int QR_BackgroundColor = 0xff00ff00; //초록색
try {
// QR 코드 생성에 사용할 설정 옵션
Map<EncodeHintType, Object> hintMap = new HashMap<>();
hintMap.put(EncodeHintType.MARGIN, 0);
hintMap.put(EncodeHintType.CHARACTER_SET, "UTF-8");
// QR 코드 매트릭스를 생성합니다.
BitMatrix bitMatrix = new MultiFormatWriter().encode(
url,
BarcodeFormat.QR_CODE,
width,
height,
hintMap
);
// 색상 지정
MatrixToImageConfig matrixToImageConfig = new MatrixToImageConfig(QR_CodeColor,QR_BackgroundColor);
// 지정한 색상과 BitMatrix를 BufferedImage로 변환
BufferedImage bufferedImage = MatrixToImageWriter.toBufferedImage(bitMatrix, matrixToImageConfig);
// BufferedImage를 Base64로 인코딩
ByteArrayOutputStream outputStream = new ByteArrayOutputStream();
ImageIO.write(bufferedImage, fileType, outputStream);
return Base64.getEncoder().encodeToString(outputStream.toByteArray());
} catch (Exception e) {
e.printStackTrace();
}
return null;
}
zxing 라이브러리는 구글에서 만든 라이브러리라 그런지 색상 코드를 Android Graphic Color로 사용합니다.
하지만 제 웹사이트에는 JavaScript의 Coloris라는 기능을 사용할건데요.
우선 Coloris라는 기능이 궁금하시다면 이전 포스팅을 참고해주세요. ▼
[Javascript] Javascript Color Picker(Coloris) 적용하기
안녕하세요. 오늘은 JavaScript 라이브러리인 Color Picker(Coloris) 적용하는 방법을 알아보겠습니다. Coloris 적용하기우선 Coloris 깃허브 페이지에 접속해서 js와 css 파일을 다운받습니다. Release v0.24.0
web-developer1.tistory.com
Android Graphic Color로 변환하기
Coloris에서는 색상 코드를 hex로 사용합니다.
그럼 hex 코드를 Android Graphic Color로 변환해야하는데요.
제가 찾아보니 hex코드를 Android Graphic Color로 자동으로 변환하는 방법은 없더라구요. (아시는분 있으면 댓글 부탁드립니다...)
즉 하드코딩 방식으로 변환해줘야 합니다.
변환하는 소스는 아래와 같습니다.
public static int hexToArgb(String hexColor) {

		if (hexColor.startsWith("#")) {
            hexColor = hexColor.substring(1); // '#' 제거
        }

		hexColor = "FF" + hexColor;		//FF는 alpha 값 1

		int argb = (int) Long.parseLong(hexColor, 16);

        return argb;
	}
모든 소스 종합하기
이제 추가한 Coloris와 ajax, java 소스를 합쳐보겠습니다.
test.jsp
<%@ page language="java" contentType="text/html; charset=UTF-8"
    pageEncoding="UTF-8"%>
<!DOCTYPE html>
<html>
<head>
<meta charset="UTF-8">
<title>Insert title here</title>
</head>
<link rel="stylesheet" href="/css/coloris.css"/>
<body>
	<input id="rink"  /><button onclick="javascript:goQRGenerate();">생성</button>
	Code Color : <input type="text" id="codeColor" data-coloris value="#000000"/>
	Background Color : <input type="text" id="backgroundColor" data-coloris value="#ffffff"/>
	<div id="qrResult"></div>
</body>
<script type="text/javascript" src="/js/coloris.js"></script>
<script>
	Coloris({
		parent: '.demo',
		theme: 'default',     //default, large, polaroid, pill
		themeMode: 'light',   //light , dark 모드
		margin: 2,            //입력 필드와 색선택시 사이 여백
		alpha: false,          //불투명도 조절
		format: 'hex',        //포맷  hex rgb hsl auto mixed
		formatToggle: false,   //포맷 토글
// 		clearButton: true,
// 		clearLabel: 'Clear',
		swatches: [
			'#264653',
			'#2a9d8f',
			'#e9c46a',
			'rgb(244,162,97)',
			'#e76f51',
			'#d62828',
			'navy',
			'#07b',
			'#0096c7',
			],
		inline: false,
		defaultColor: '#000000',
	});
</script>
<script src="https://cdnjs.cloudflare.com/ajax/libs/jquery/3.6.0/jquery.min.js" integrity="sha512-894YE6QWD5I59HgZOGReFYm4dnWc1Qt5NtvYSaNcOP+u1T9qYdvdihz0PPSiiqn/+/3e7Jo4EaG7TubfWGUrMQ==" crossorigin="anonymous" referrerpolicy="no-referrer"></script>
<script>

	function goQRGenerate() {
		const url = $("#rink").val();
		const codeColor = $("#codeColor").val();
		const backgroundColor = $("#backgroundColor").val();

		$.ajax({
			type:"POST",
			url: "/qr/generate",
			data: {
				"url": url,
				"codeColor" : codeColor,
				"backgroundColor" : backgroundColor,
			},
			success: function(data){

				if(data){
					const imgSrc = "data:image/png;base64," + data;
					const imgTag = "<img src=\"" + imgSrc + "\" alt=\"QR Code\">";
					$("#qrResult").html(imgTag);
				}

			}

		});
	}
</script>
</html>
controller.java
@PostMapping(value = "/qr/generate")
	public  @ResponseBody String test(String url, String codeColor, String backgroundColor) throws WriterException {
		log.info(url + " / " + codeColor + " / " + backgroundColor);
		// QR 정보
        int width = 200;
        int height = 200;
        String fileType = "png";

        // Android.Graphic.Color
        int QR_CodeColor = hexToArgb(codeColor);
	    int QR_BackgroundColor = hexToArgb(backgroundColor);

        try {
            // QR 코드 생성에 사용할 설정 옵션
            Map<EncodeHintType, Object> hintMap = new HashMap<>();
            hintMap.put(EncodeHintType.MARGIN, 0);
            hintMap.put(EncodeHintType.CHARACTER_SET, "UTF-8");

            // QR 코드 매트릭스를 생성합니다.
            BitMatrix bitMatrix = new MultiFormatWriter().encode(
            		url,
                    BarcodeFormat.QR_CODE,
                    width,
                    height,
                    hintMap
            );

            // 색상 지정
            MatrixToImageConfig matrixToImageConfig = new MatrixToImageConfig(QR_CodeColor,QR_BackgroundColor);

            // 지정한 색상과 BitMatrix를 BufferedImage로 변환
            BufferedImage bufferedImage = MatrixToImageWriter.toBufferedImage(bitMatrix, matrixToImageConfig);

            // BufferedImage를 Base64로 인코딩
            ByteArrayOutputStream outputStream = new ByteArrayOutputStream();
            ImageIO.write(bufferedImage, fileType, outputStream);

            return Base64.getEncoder().encodeToString(outputStream.toByteArray());

        } catch (Exception e) {
            e.printStackTrace();
        }

        return null;
	}

	public static int hexToArgb(String hexColor) {

		if (hexColor.startsWith("#")) {
            hexColor = hexColor.substring(1); // '#' 제거
        }

		hexColor = "FF" + hexColor;		//FF는 alpha 값 1

		int argb = (int) Long.parseLong(hexColor, 16);

        return argb;
	}
ajax로 요청하는 method를 POST 방식으로 변경했습니다.
Color 코드값을 GET 방식으로 요청하면 샾(#) 때문에 에러가 발생하더라구요.
위 소스를 종합하면 이런식으로 QR 코드를 생성할 수 있습니다!
다음엔 더 유용한 내용으로 포스팅하겠습니다!
읽어주셔서 감사합니다.
'웹개발 프로젝트 > QR코드 생성기' 카테고리의 다른 글
| [QR.G] JAVA zxing을 이용해서 WIFI 연결하는 QR코드 만들기 (2) | 2024.10.13 |
|---|---|
| [QR.G] JAVA로 QR 코드 생성하는 웹페이지 만들기 (0) | 2024.08.18 |

